

Get started with kbagent
A guided first run of the kbagent CLI — install it, connect a Keboola project, verify with doctor, and run your first read commands. Plus multi-project and organization setup.
This walkthrough takes you from nothing to browsing a real project with kbagent in a few minutes. Follow it top to bottom for a single project; the Connect more section covers multi-project and organization setup.
Step 1 — Install
Section titled “Step 1 — Install”Pick your operating system:
Recommended — the prebuilt wheel via the install script:
curl -LsSf https://raw.githubusercontent.com/keboola/cli/main/install.sh | shAlternative — uv, if you want to pin to a version or uninstall cleanly:
uv tool install "git+https://github.com/keboola/cli"Recommended — the prebuilt wheel via the install script:
curl -LsSf https://raw.githubusercontent.com/keboola/cli/main/install.sh | shAlternative — uv, if you want to pin to a version or uninstall cleanly:
uv tool install "git+https://github.com/keboola/cli"The curl … | sh one-liner cannot run on Windows. Windows has shipped curl.exe since Windows 10 1803, but it has no sh, so the command fails with 'sh' is not recognized in both cmd and PowerShell. Installing Git for Windows does not fix that. Its installer only puts C:\Program Files\Git\cmd on PATH, while sh.exe lives in usr\bin.
Recommended: PowerShell, no POSIX shell needed. This fetches the same wheel the install script would have:
winget install --id astral-sh.uv -e$ver = (Invoke-RestMethod "https://api.github.com/repos/keboola/cli/releases/latest").tag_name.TrimStart('v')uv tool install --force "keboola-cli[server] @ https://github.com/keboola/cli/releases/download/v$ver/keboola_cli-$ver-py3-none-any.whl"uv tool update-shellSkip the first line if you already have uv. That line installs uv itself. The whole block works in the in-box Windows PowerShell 5.1, so you don’t need PowerShell 7.
The second line calls the GitHub API without a token. If you are rate-limited or behind a proxy that blocks it, $ver comes back empty and the third line asks uv for a URL that does not exist, which surfaces as a 404. Check with echo $ver. If it is empty, read the version off the releases page and set it by hand, e.g. $ver = "0.91.0".
Then open a new shell. uv tool update-shell edits the persisted PATH, and the session you ran it in will not see the change.
Two alternatives:
-
Already have Git for Windows? Run the documented script through its bash:
Terminal window & "C:\Program Files\Git\bin\bash.exe" -lc "curl -LsSf https://raw.githubusercontent.com/keboola/cli/main/install.sh | sh" -
No Python on the machine? Every release ships a self-contained build. Download
keboola-cli2_<version>_windows_amd64.zipfrom the releases page, unpack it, and put the folder onPATH. It carries its own interpreter and needs neither Python nor uv.
Whichever method you use, kbagent keeps itself current with its own startup update check (kbagent update runs one manually).
Confirm it’s on your PATH (all platforms):
$ kbagent --versionkbagent v0.91.0Step 2 — Connect your project
Section titled “Step 2 — Connect your project”Register a project with the CLI so you (or your agent) can reach it. There are two ways in: sign in through the browser, or hand kbagent a Storage API token.
Sign in through the browser
Section titled “Sign in through the browser”At your own keyboard, this is the shortest route. It needs no token.
First sign in to the stack:
kbagent auth login --stack https://connection.keboola.comThat opens a browser, and you finish the sign-in there. On a machine with no browser it prints a code you type into a page on another device instead.
Then pick which projects to register locally:
kbagent auth register-projectsIt shows a picker of every project the account can reach and registers the ones you choose. Add --all to register all of them without the picker.
Both commands need a real terminal. There is no headless path through auth login.
Or register one project with a token
Section titled “Or register one project with a token”kbagent project add --project prod --url https://connection.keboola.com --token YOUR_TOKENproject add is the static-token route. It reads the token from --token, or from KBC_TOKEN if you’d rather keep it off the command line. With neither, it prompts with hidden input, so the value never lands in your shell history. That prompt needs a TTY an agent’s tool-run shell does not have.
Swap the URL for your own stack. prod is an alias you pick. You use it with --project later, or set it as the default with kbagent project use prod. Add as many projects as you want.
You sign in once per machine. Every tool reads the same local config, so a project you connected here is already there in Claude Code, Cursor, VS Code and the rest. kbagent project list shows what is registered, and its Auth column says session or static per project.
When you need a token
Section titled “When you need a token”CI, containers, cron, and anything else running unattended need a Storage API token, because auth login cannot run there. A few features need a static token rather than a browser session too: Kai, data apps, the semantic layer, streams, and the Python SDK.
These docs cannot create a token for you. Open your project in the Keboola UI and go to Settings → Developer settings → Agentic CLI. That page builds the exact kbagent project add command for your project and your stack, and it can include a read-only token in it. Copy it from there.
If you don’t see Agentic CLI in your project’s settings, create the token yourself under Settings → API Tokens and pass it as --token. API tokens covers that screen.
A Storage API token is enough for browsing. Some commands need an admin (master) token, e.g. creating branches or workspaces needs admin privileges. Token types and scoping options are covered in API tokens.
Step 3 — Verify the connection
Section titled “Step 3 — Verify the connection”kbagent doctor checks your configuration and connectivity. Once a project is connected it confirms the link and flags anything else worth doing (like installing the agent plugin):
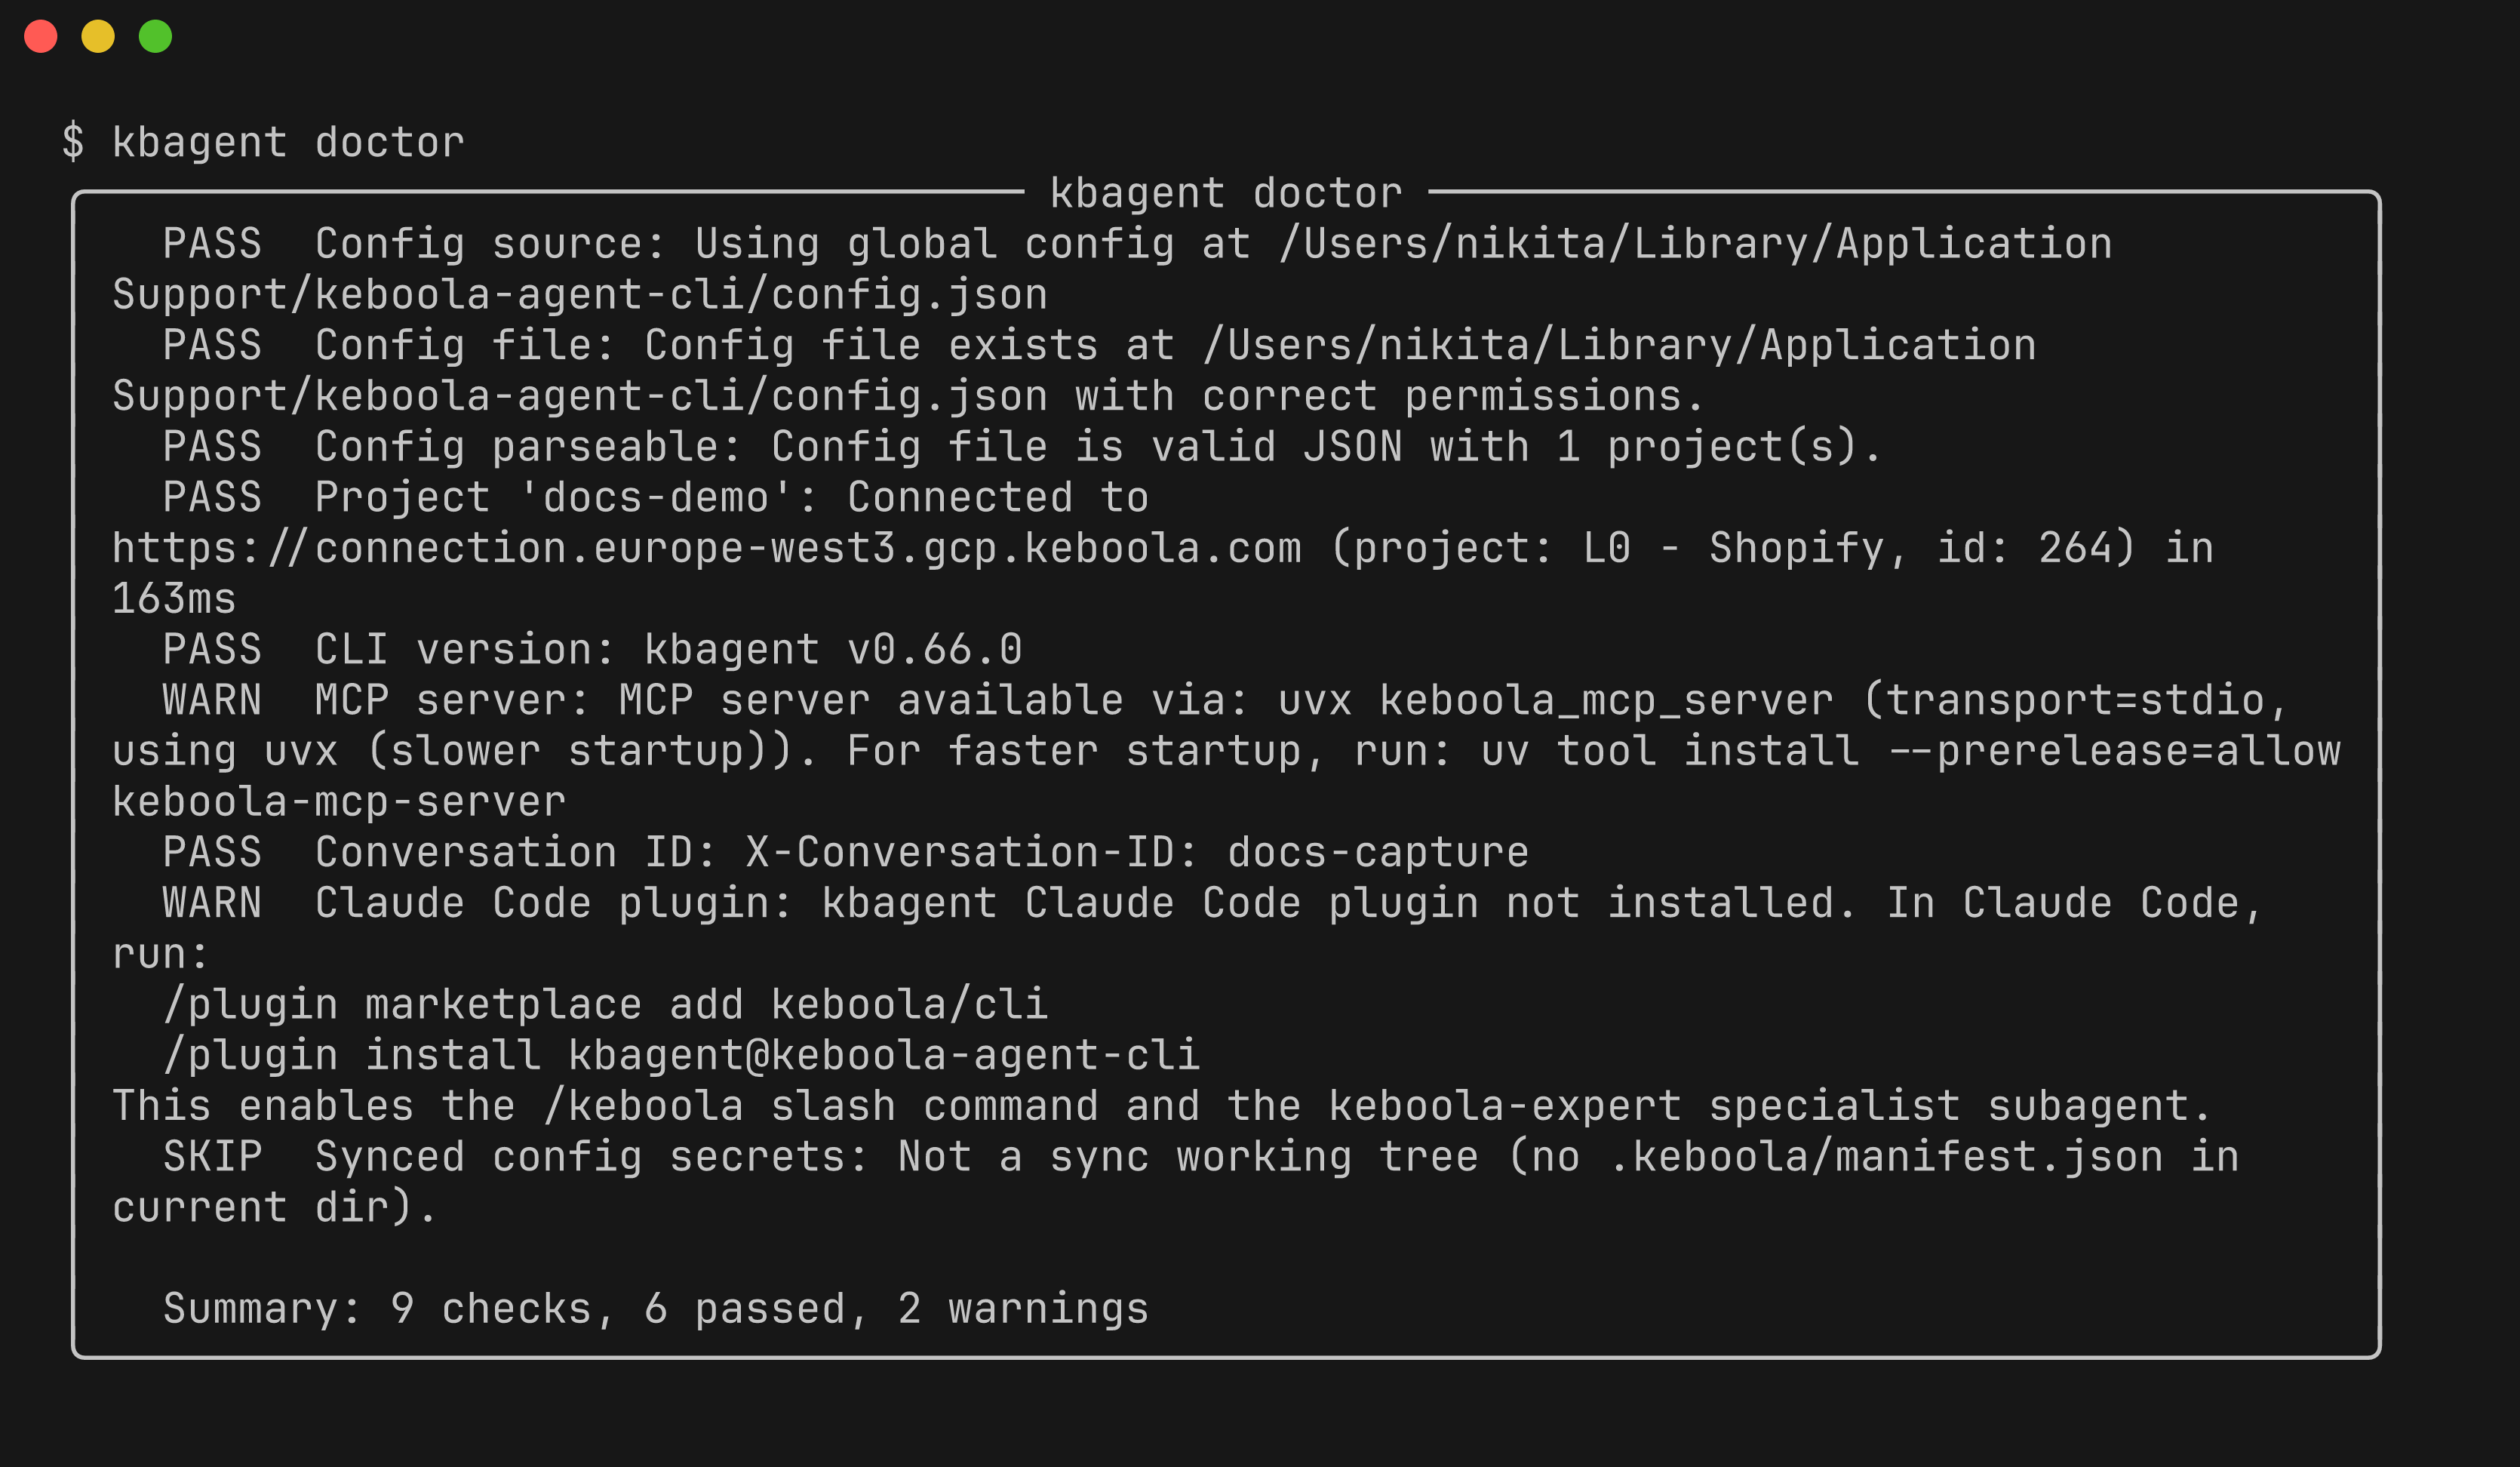
You can also test connectivity on its own with kbagent project status.
Step 4 — Browse the project
Section titled “Step 4 — Browse the project”Explore what’s there. Recent jobs:
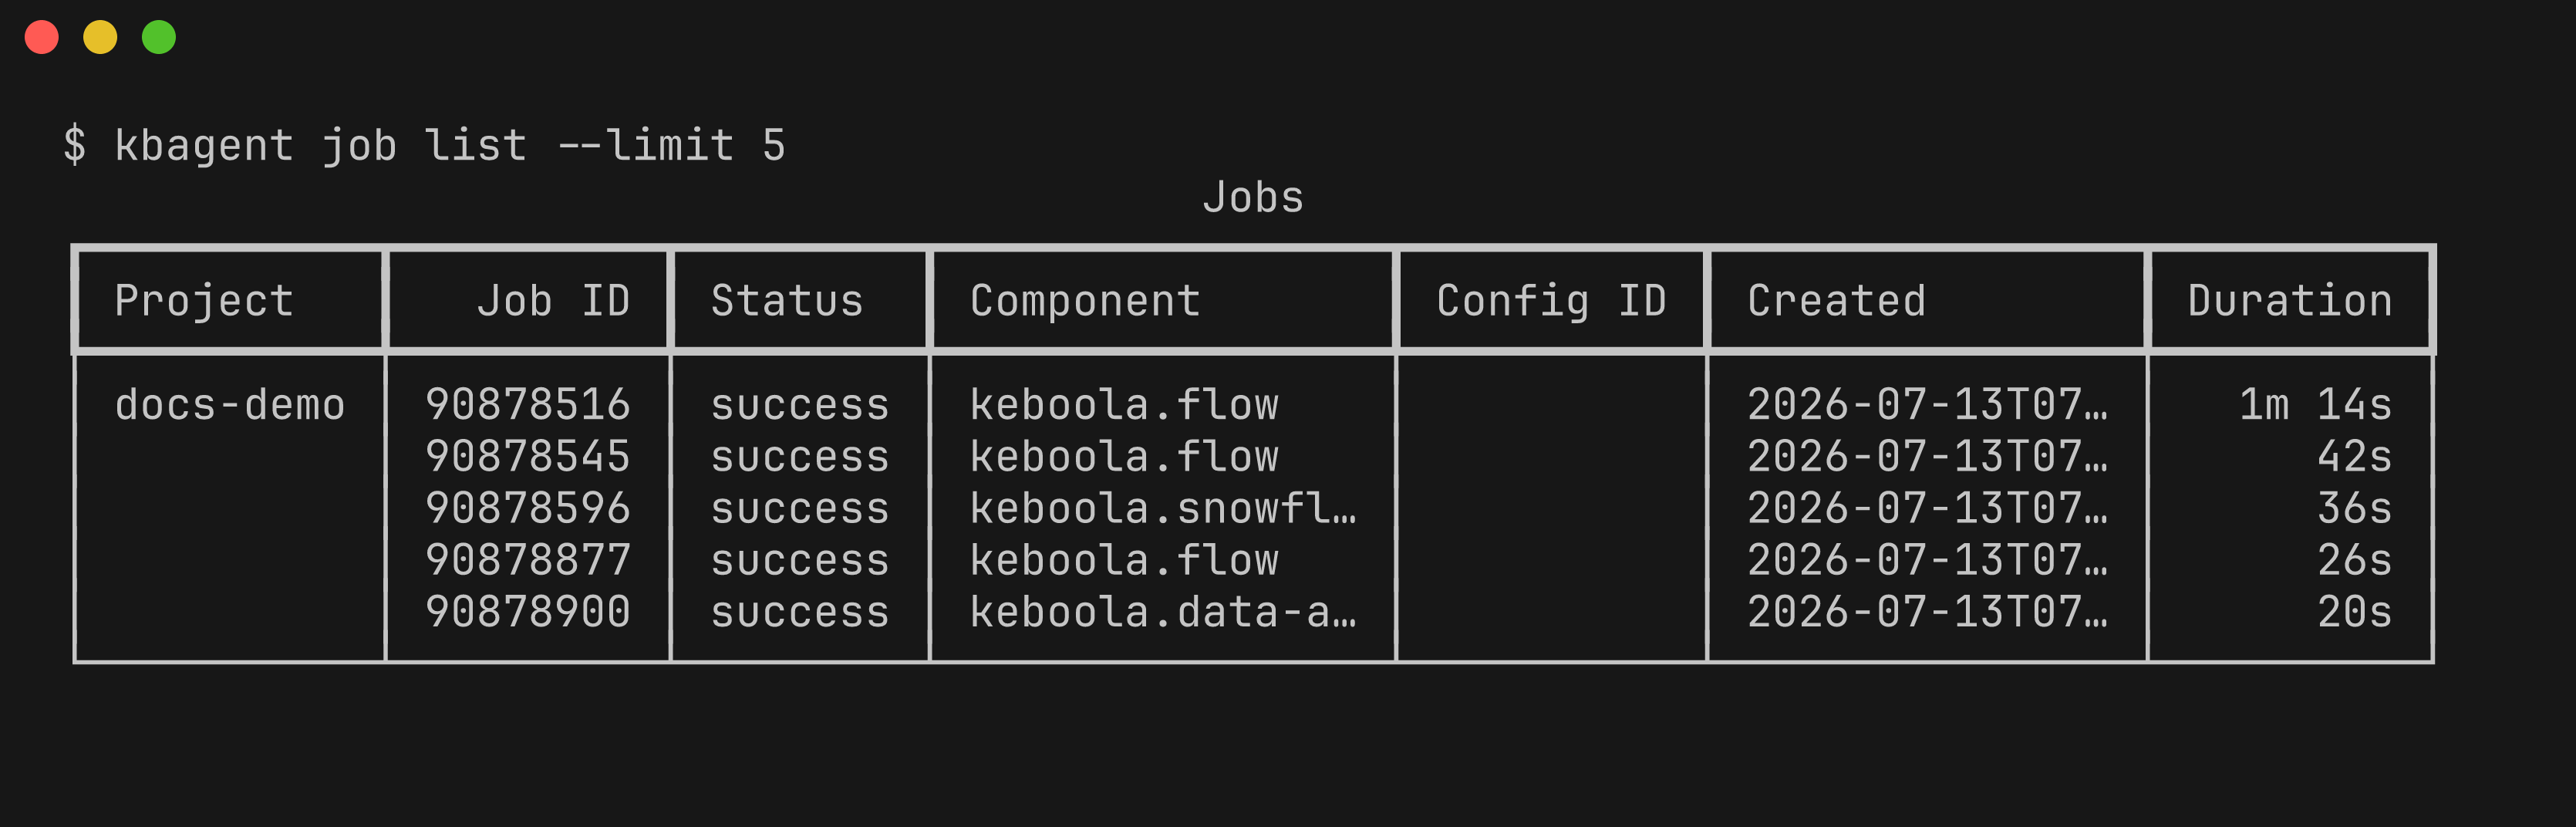
kbagent job list --limit 5 # recent jobs (shown above)kbagent project list # connected projectskbagent config list # configurations across all connected projectsStep 5 — Search
Section titled “Step 5 — Search”Find configs, tables, buckets, and flows by name or content:
kbagent search "shopify"Step 6 — Go further
Section titled “Step 6 — Go further”-
Add
--jsonto any command for machine-readable output — this is what an AI agent consumes. -
Set a conversation ID when an agent drives kbagent, so platform observability can correlate the session (adds an
X-Conversation-IDheader):Terminal window export KBAGENT_CONVERSATION_ID="<unique-id>"
Connect more projects
Section titled “Connect more projects”Several projects — register each one with project add, or bulk-onboard with a Manage API token:
KBC_MANAGE_API_TOKEN=xxx kbagent --allow-env-manage-token \ org setup --project-ids 901,9621 --url https://connection.keboola.com --yesA whole organization (org admin) — kbagent registers every project and mints per-project tokens:
KBC_MANAGE_API_TOKEN=xxx kbagent --allow-env-manage-token \ org setup --org-id 123 --url https://connection.keboola.com --yesRead commands then fan out across every connected project — see multi-project.
Something failing along the way? The Troubleshooting page covers the most common errors and their fixes.
Next: How kbagent works →